Showing posts with label Tutorials. Show all posts

Thursday, October 6, 2011

Starched Fabric Flower Tutorial


Yet again another flower tutorial, I'm sorry I cant help myself I have 3 girls and they are super girly. Accessorize, accessorizes, accessorize. I have been wanting to do a fabric flower in a tea cup shape but did not really know how to go about it. I wanted to use cotton fabric so melting the edges was out and I did not want to sew it. So I decide to use starch and see If I could give a flat piece of fabric some dimension. And here is what I got.


Here's the how to:
 Start out by choosing coordinating fabrics, I used cotton fabric, really stiff tulle, 1 layer of that silky fabric. I know I really suck, I have no clue what it is called. You know the silk type fabric that you can melt the edges. Moving on....
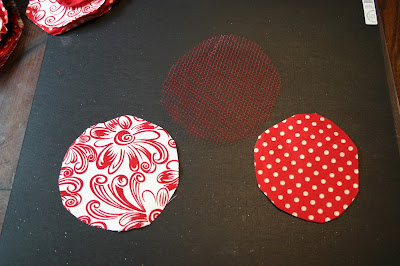
Start cutting circles making each circle just a little bit smaller than the last. 
For my back layer I did 3 circles. The purpose of the back layer is that I did not want my entire flower to look like a tea cup and stick off my girls head so I added a floppy layer that will lay against their heads. I just prefer it that way. If you want you could starch this layer to.

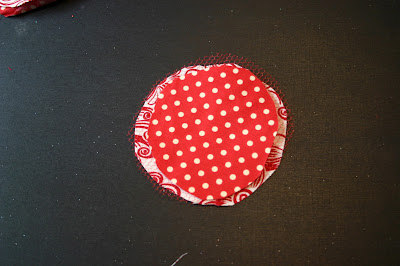
Stack them up and you have the "back" layer.
 Now for the front layer. I used 5 circles, one of them in the lets just call it the "silky layer".  I made 3 of them quite a bit larger, these are going to get starched into a tea cup shape so I wanted them to be a little larger. Heat the edges of the "silky layer" with a lighter melting all of the edges. Make sure you cut it out a little bigger than you want it to end up because when you melt the edges it will shrink down.


Here are the front and back layers.

Time to play with the starch! Pick up some heavy starch at the grocery store. Lay out a cloth on your counter so that you don't cover it in starch. I used bowls that I did not care about ruining. Place your fabric circles into the bowl and cover them with starch spray. Starch all of the front layers except the "silky layer".

After you have sprayed the fabric with starch blow dry it on a low setting until it is dry. I did do a second starch to a few of my layers becasue they were not as curved as I wanted them to be. **Remember** I did not starch my back layer, but again its up to you.

By the way the starch washed out of the bowls just fine.
Here are the starched layers.


Now stack all the layers up. Note: this picture is showing 2 flowers.

Notice the flat layers on the bottom.

Choose an emblishment for your center. I like to use brads. They are the easiest and hold the whole flower firmly together. Poke a hole in the center of the flower making sure to go through all the layers. Insert a brad through all layers, easy. If you want to use a gem or button center you will have to glue all the layers together one at a time.


I love to add feathers to my flowers. It gives it that finishing touch. Hot glue a feather in between one of the back layers


Wrap the feather back around and glue the end of the feather to the same layer.
I did 2 feathers on my flower, one on each side.I don't let the feathers stick out very much either. Just a little fluff is all you need. I wish the same could be said for me :)

The last step is to flip the flower over and glue your clip or headband on.


Now you have a cute flower.

 
I am so lucky to have such a cute model too!


This is what it looks like when I craft. Messy huh!


Friday, June 24, 2011

Firework Centerpiece Tutorial


I came up with these cute fireworks after being inspired by Martha Stewart.
I made quite a few changes of my own but you've got to give credit where credit is due.

  Tools needed:

I choose to use 12x 12 glittered card stock for my fireworks, you can use whatever makes you happy.
I picked up red, blue and teal from Hobby Lobby. 1 12x12 sheet will make you 4 fireworks.
Start by cutting the card stock in half making 2-12x6 pieces.
I used a rotary cutter instead of scissors to make my cuts, either would work. Make 1/4 inch cuts leaving around and inch at the top uncut.
I slid my stick between a few layers just to show you what the cuts look like.
Here is the back side, its a little easier to see whats going on here without all that glitter.

Now cut that piece in half again, making 2- 6x6 pieces.
Pre-curl your paper before you glue it on the stick, very helpful step!
Use a shish kabob stick and super glue the paper around your stick. Just glue and roll as tight as you can.
Here is what it looks like when it's all rolled up.
I left some of my fireworks straight and I make some of them curl. Use a pencil or a pen and wrap the paper strips around it to make the curled effect.
Fireworks!!
Next I put my fireworks into canning jars, I liked the effect but you could use any jar or container you want.

Next I filled my jars 3/4 full of sand, again anything you want to use will work. I like that sand is heavy and my fireworks ,hopefully, wont fall over.


I ordered these cool 4th of July straws from Isakay Boutique on Etsy. 
I choose red & blue stars and red & blue stiped straws.


Take a straw and slide it onto your stick before you put the firework into the jar.
I put 5 fireworks into each of my jars.**update: I added a cute metal pinwheel to the center**
 

 Now to embellish your jar. I cut 2 circles out with my Sizzix. 
I ran the white circle through my crimper. I also cut out a star with one of 
my little star punches. All this can be done by hand if you don't have the right tools, 
well except the crimping.
I used hot glue to glue the ribbon around the jar. 
Just glue the backside not all the way around because it will look funny.
You can use tape if you want to reuse your jars later. 
I did not want the ribbon to come off while being moved so I used hot glue.
 
Now you're done!! What an awesome 4th of July center piece. 
I sure am excited to use mine. I actually made 5 jars for
the party we are having next weekend.
Here is where my inspiration came from Martha Stewart

They used vellum on theirs. I was after super sparkly that's why I choose
to use sparkly card stock. Like I've said before "whatever makes you happy".
I hope everyone enjoys their 4th of July. I will be living it up because
it is my last year to be in my twenty's, that's right 
I will be 29 on the 4th of July, {sad sigh}. 
I think I would like to be 20 forever, who wouldn't. Okay enough with the pitty party.
Happy 4th!
Pin It

Monday, January 31, 2011

Fabric Flower Tutorial

Fabric flowers are really fun and easy to make. They make great head bands or cute accessories to any of your projects.

Start out by choosing your favorite fabric and cutting it into 2 inch strips. To make a small 2 inch flower you need a strip or several strips that add up to be about 3 feet.

You need a base to make your flower on, I used felt for this flower but you can also use heavy card stock. Cut whatever you decide to use into a circle that is the size you want your finished flower to be. For mine I used a 2 inch felt circle.


When I am using felt I like to use hot glue for my adhesive and tacky glue when I am using card stock.

Next fold your fabric in half so that the pattern is showing on both sides and then tie the end of your fabric into a knot. Glue it to the center of your circle.

Start twisting your fabric, if you do not want any fray to show make sure as you are twisting that you tuck them in. I like a little frayed look so I let them do whatever they want. Once your fabric is twisted start gluing and wrapping it around your knot. Put the glue directly on the felt and then press the fabric to it.

Keep wrapping the fabric around until it is the size you would like it to be. If you decide you want the flower to be a little smaller than your felt circle you can trim off the excess felt.

Once the flower is the size you want it to be take the tale, tuck and glue it under the flower.


Voila!! Now you have a fabric flower. For different variations you can twist your fabric more loosely or even tighter. You can also use wider fabric strips.


I chose to make an accessory for a jar I have in my scrapbook room by adding ribbon and a gem to the center of the flower and then attaching it to my jar. This would have made a super cute head band too!


Linked to:
back to top