I just love fairy gardens. My only problem is that I never put fairies in them. Just the illusion that a fairy is nearby and that you have stumbled upon their home. I used fake succulents, moss, marbles, wooden disks and a cute wooden bird house that my dad made for me. I also hung a bead and crystal charm on the bird house to help catch some light. I even included a cute little bumblebee rock that a friend painted for me.
Showing posts with label Flowers. Show all posts
Showing posts with label Flowers. Show all posts
Wednesday, August 6, 2025
Thursday, October 6, 2011
Starched Fabric Flower Tutorial
Yet again another flower tutorial, I'm sorry I cant help myself I have 3 girls and they are super girly. Accessorize, accessorizes, accessorize. I have been wanting to do a fabric flower in a tea cup shape but did not really know how to go about it. I wanted to use cotton fabric so melting the edges was out and I did not want to sew it. So I decide to use starch and see If I could give a flat piece of fabric some dimension. And here is what I got.
Here's the how to:
Start out by choosing coordinating fabrics, I used cotton fabric, really stiff tulle, 1 layer of that silky fabric. I know I really suck, I have no clue what it is called. You know the silk type fabric that you can melt the edges. Moving on....
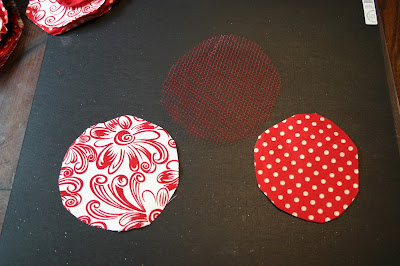
Start cutting circles making each circle just a little bit smaller than the last.
For my back layer I did 3 circles. The purpose of the back layer is that I did not want my entire flower to look like a tea cup and stick off my girls head so I added a floppy layer that will lay against their heads. I just prefer it that way. If you want you could starch this layer to.
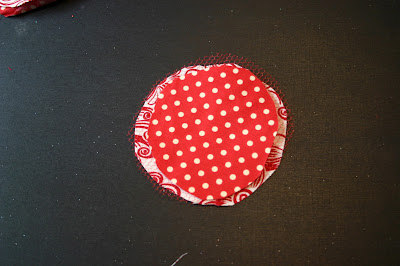
Stack them up and you have the "back" layer.
Now for the front layer. I used 5 circles, one of them in the lets just call it the "silky layer". I made 3 of them quite a bit larger, these are going to get starched into a tea cup shape so I wanted them to be a little larger. Heat the edges of the "silky layer" with a lighter melting all of the edges. Make sure you cut it out a little bigger than you want it to end up because when you melt the edges it will shrink down.
Here are the front and back layers.
Time to play with the starch! Pick up some heavy starch at the grocery store. Lay out a cloth on your counter so that you don't cover it in starch. I used bowls that I did not care about ruining. Place your fabric circles into the bowl and cover them with starch spray. Starch all of the front layers except the "silky layer".
After you have sprayed the fabric with starch blow dry it on a low setting until it is dry. I did do a second starch to a few of my layers becasue they were not as curved as I wanted them to be. **Remember** I did not starch my back layer, but again its up to you.
By the way the starch washed out of the bowls just fine.
Here are the starched layers.
Now stack all the layers up. Note: this picture is showing 2 flowers.
Notice the flat layers on the bottom.
Choose an emblishment for your center. I like to use brads. They are the easiest and hold the whole flower firmly together. Poke a hole in the center of the flower making sure to go through all the layers. Insert a brad through all layers, easy. If you want to use a gem or button center you will have to glue all the layers together one at a time.
I love to add feathers to my flowers. It gives it that finishing touch. Hot glue a feather in between one of the back layers
Wrap the feather back around and glue the end of the feather to the same layer.
I did 2 feathers on my flower, one on each side.I don't let the feathers stick out very much either. Just a little fluff is all you need. I wish the same could be said for me :)
The last step is to flip the flower over and glue your clip or headband on.
Now you have a cute flower.
I am so lucky to have such a cute model too!
This is what it looks like when I craft. Messy huh!
Monday, May 23, 2011
Fabric Flower Tutorial
I made up this cute flower pattern for headbands to match my girls Easter dresses. They turned out so cute that as promised I thought I would share them with you!
Start out by cutting your material into 2 inch strips, they need to be about 20 inches long. (you will need 1 strip per flower)
fold your material in half lengthwise placing wrong sides together and iron.
This flower is basically made by shaping your fabric into triangles.
Start out by folding the top over to make a dog ear out of the fabric then iron in place.
Fold fabric over to create a triangle shape and press with iron.
Next you are going to loop your fabric back
and tuck it in between your triangle.
Snug the fabric up into a triangle and press.
Again you are going to loop your fabric back around
this time tuck the fabric behind the triangle
Fold your fabric down and tuck under triangle.
Snug up triangle and press (sorry for the blurry picture)
Continue folding and pressing to make a triangle shape until you run out of fabric.
When you are done it should look something like this.
Take a needle and thread in a similar color to fabric and sew threw the center of the flower catching all the layers to secure them together.
Next take a small piece of felt and a clip and hot glue them to the underside of flower.
I always turn the clip upside down when gluing because when you turn the flower over it will be right side up.
Embellish your flower however you choose. For this flower I chose flat back gems and hot glued them into place.
Now you are done!
This flower has pearl beads sewn into it center.
For this headband I made 3 flower that were the same size. Then I glued them to a fabric headband that I had made. I also used a piece of feather boa behind the flowers to give it that finishing touch.
I hope that was not to confusing. Just think "triangles" and you will be fine. Thanks for stopping by and happy folding!


I linked this project to:
craftomaniac
homemakeronadime
makingtheworldcuter
thecreativecrate
runwithglitter
todayscreativeblog
pollywantacrafter
diybydesign
sweetpeasandbb
sistersstuff
fingerprintsonthefridge
sugaranddots


I linked this project to:
craftomaniac
homemakeronadime
makingtheworldcuter
thecreativecrate
runwithglitter
todayscreativeblog
pollywantacrafter
diybydesign
sweetpeasandbb
sistersstuff
fingerprintsonthefridge
sugaranddots
Labels:
Flowers
Subscribe to:
Posts (Atom)


