Monday, October 17, 2011

Halloween {Bat Plates} !!

I saw these on..... wait for it....... Pinterest. 
I'm sorta addicted these days, and I'm not the only one.
So here is my version of Better Homes and Gardens {bat plates}. 


Supplies:
Clear plates, 2 per bat 
(I got mine at Zurchers, I also purchased extra plates so that I could use my 
{bat plates} again without trying to find matching plates in the future.)

Black paper for wings 
(I got this super sparkly paper from Joann's, for a good price too!)

An assortment of card stock for body, eyes and mouth

Black stamping ink

 Tape/glue dots
 
Print 3 bat face patterns and 1 bat wing pattern
(You do have to sign into BHG before you can download the pattern)

 When you print out the pattern from BHG print out 3 bat bodies so that you can cut out the mouth on one, the eyes on another and the body shape from the last. Heads up, on mine I reshaped the bat so that both of their ears were the same. BHG's just seamed a little off, so it's up to you if you want to reshape or not.
For mine I did not bother cutting out the eyes, I just played around with my Cricut to make all of the layers for the eyes. I ended up using a variety of sizes and shapes. If you have a Cricut just play around a bit. If not you can always follow the pattern. 
I did however use the pattern for the mouth and fangs.
Rub the ink pad around the edges of all the layers of the eyes and mouth. Make sure to do the bats body too. I used glue dots to put all the layers of eyes on my bat, just make sure to NOT use pop up glue dots. Just a side not: I made every one of my plates with different patterns and paper, I even place the mouths going the opposite direction on a couple of them.

 Cut out the wing pattern, make sure to cut out one wing with the pattern right side up and then flip it over and cut out a reverse wing so that you have a wing for each side of the plate. I don't really think you are dumb I just want to be super clear on all the details.

After your wings are cut out and your bats are assembled grab your clear plates. Tape the bat wings directly to the plate and shape them to the bends in the plate. Next set your bat on the plate, I did not tape my bat to the plate because they stayed in the bottom nicely. You can always tape them if you want, whatever works.
  Next place another clear plate over your bat and tadaah you have a very cute {bat plate}. After you eat on them you can just throw away the top plate and replace it with a new one then you will be able to use them again.
On the BHG directions they put brads all around the plate so that everything would stay together. I wanted to be able to use them again so I chose not to do this step. If you are a one time kinda gal then brad away!

 Here are all of my different bats!! 

I made 6 total for my family.
I am thinking of having a fun Halloween dinner and serve festive food's. 
Maybe I will make it a new family tradition, Halloween Dinner.
I will have to share another idea with you soon that I picked up from a friend. She did a spooky dinner for her family were she made up menu's with funky items for instance: if someone orders worms you would serve them spaghetti or if they order a devils pitch fork they would get a fork. It's kinda fun. I will have to dig out my old menu and do a post on it.

And now for my inspiration....

Check out some of my other Halloween projects.


Saturday, October 15, 2011

Glittered Pumpkins


Around our house we glitter our pumpkins instead of carving them. I live in a house full of girly girls that love glitter and so do I. Besides they last forever this way. Last year my mother-in-law had hers for over a year, I don't recommend this, just sayin. 
They are super easy to make but do be prepared for a bit of a mess. You may end up looking like the pumpkin when your done :)

Supplies: Pumpkins/squash, newspaper, adhesive spray/modge podge, glitter.

Pick a place outside on your lawn that you don't mind getting some glitter on. Spread some news paper on the ground. Place your pumpkin or squash in the center. Spray the entire thing with spray adhesive (just a warning this stuff can be toxic so make sure your kids stand back and don't breath any in if you can help it). Last year I used modge podge instead of spray adhesive. It worked out great. This year I went with spray adhesive because it was quicker. Both ways worked out great in the end so you choose your method.
After you spray or paint your adhesive on sprinkle glitter evenly over the pumpkin/squash. Just a heads up it takes a lot of glitter, a little tube wont do. I picked up a big containers at Micheal's and was able to do 1 large and 1 small pumpkin before I ran out. I think next year I will order a huge amount online, we'll see.
If you do use spray adhesive just a heads up, double spraying does not really work out well so make sure you get a good amount of adhesive on the first time around.

After you cover your pumpkin, and yourself :) with glitter let it dry. Once dry place wherever you like and enjoy.


Check out some of my other Halloween projects!!


Halloween Bats


Thursday, October 6, 2011

Starched Fabric Flower Tutorial


Yet again another flower tutorial, I'm sorry I cant help myself I have 3 girls and they are super girly. Accessorize, accessorizes, accessorize. I have been wanting to do a fabric flower in a tea cup shape but did not really know how to go about it. I wanted to use cotton fabric so melting the edges was out and I did not want to sew it. So I decide to use starch and see If I could give a flat piece of fabric some dimension. And here is what I got.


Here's the how to:
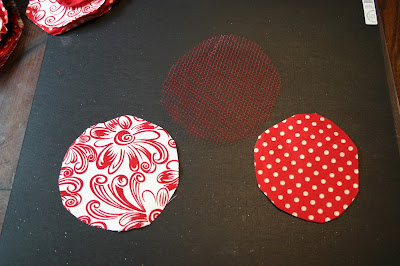
 Start out by choosing coordinating fabrics, I used cotton fabric, really stiff tulle, 1 layer of that silky fabric. I know I really suck, I have no clue what it is called. You know the silk type fabric that you can melt the edges. Moving on....
Start cutting circles making each circle just a little bit smaller than the last. 
For my back layer I did 3 circles. The purpose of the back layer is that I did not want my entire flower to look like a tea cup and stick off my girls head so I added a floppy layer that will lay against their heads. I just prefer it that way. If you want you could starch this layer to.

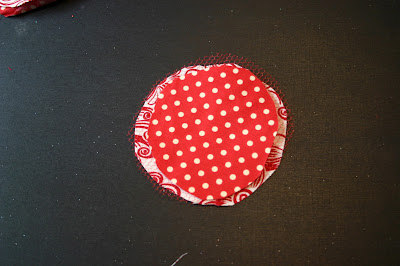
Stack them up and you have the "back" layer.
 Now for the front layer. I used 5 circles, one of them in the lets just call it the "silky layer".  I made 3 of them quite a bit larger, these are going to get starched into a tea cup shape so I wanted them to be a little larger. Heat the edges of the "silky layer" with a lighter melting all of the edges. Make sure you cut it out a little bigger than you want it to end up because when you melt the edges it will shrink down.


Here are the front and back layers.

Time to play with the starch! Pick up some heavy starch at the grocery store. Lay out a cloth on your counter so that you don't cover it in starch. I used bowls that I did not care about ruining. Place your fabric circles into the bowl and cover them with starch spray. Starch all of the front layers except the "silky layer".

After you have sprayed the fabric with starch blow dry it on a low setting until it is dry. I did do a second starch to a few of my layers becasue they were not as curved as I wanted them to be. **Remember** I did not starch my back layer, but again its up to you.

By the way the starch washed out of the bowls just fine.
Here are the starched layers.


Now stack all the layers up. Note: this picture is showing 2 flowers.

Notice the flat layers on the bottom.

Choose an emblishment for your center. I like to use brads. They are the easiest and hold the whole flower firmly together. Poke a hole in the center of the flower making sure to go through all the layers. Insert a brad through all layers, easy. If you want to use a gem or button center you will have to glue all the layers together one at a time.


I love to add feathers to my flowers. It gives it that finishing touch. Hot glue a feather in between one of the back layers


Wrap the feather back around and glue the end of the feather to the same layer.
I did 2 feathers on my flower, one on each side.I don't let the feathers stick out very much either. Just a little fluff is all you need. I wish the same could be said for me :)

The last step is to flip the flower over and glue your clip or headband on.


Now you have a cute flower.

 
I am so lucky to have such a cute model too!


This is what it looks like when I craft. Messy huh!


back to top