I made up this cute flower pattern for headbands to match my girls Easter dresses. They turned out so cute that as promised I thought I would share them with you!

Start out by cutting your material into 2 inch strips, they need to be about 20 inches long. (you will need 1 strip per flower)


fold your material in half lengthwise placing wrong sides together and iron.

This flower is basically made by shaping your fabric into triangles.
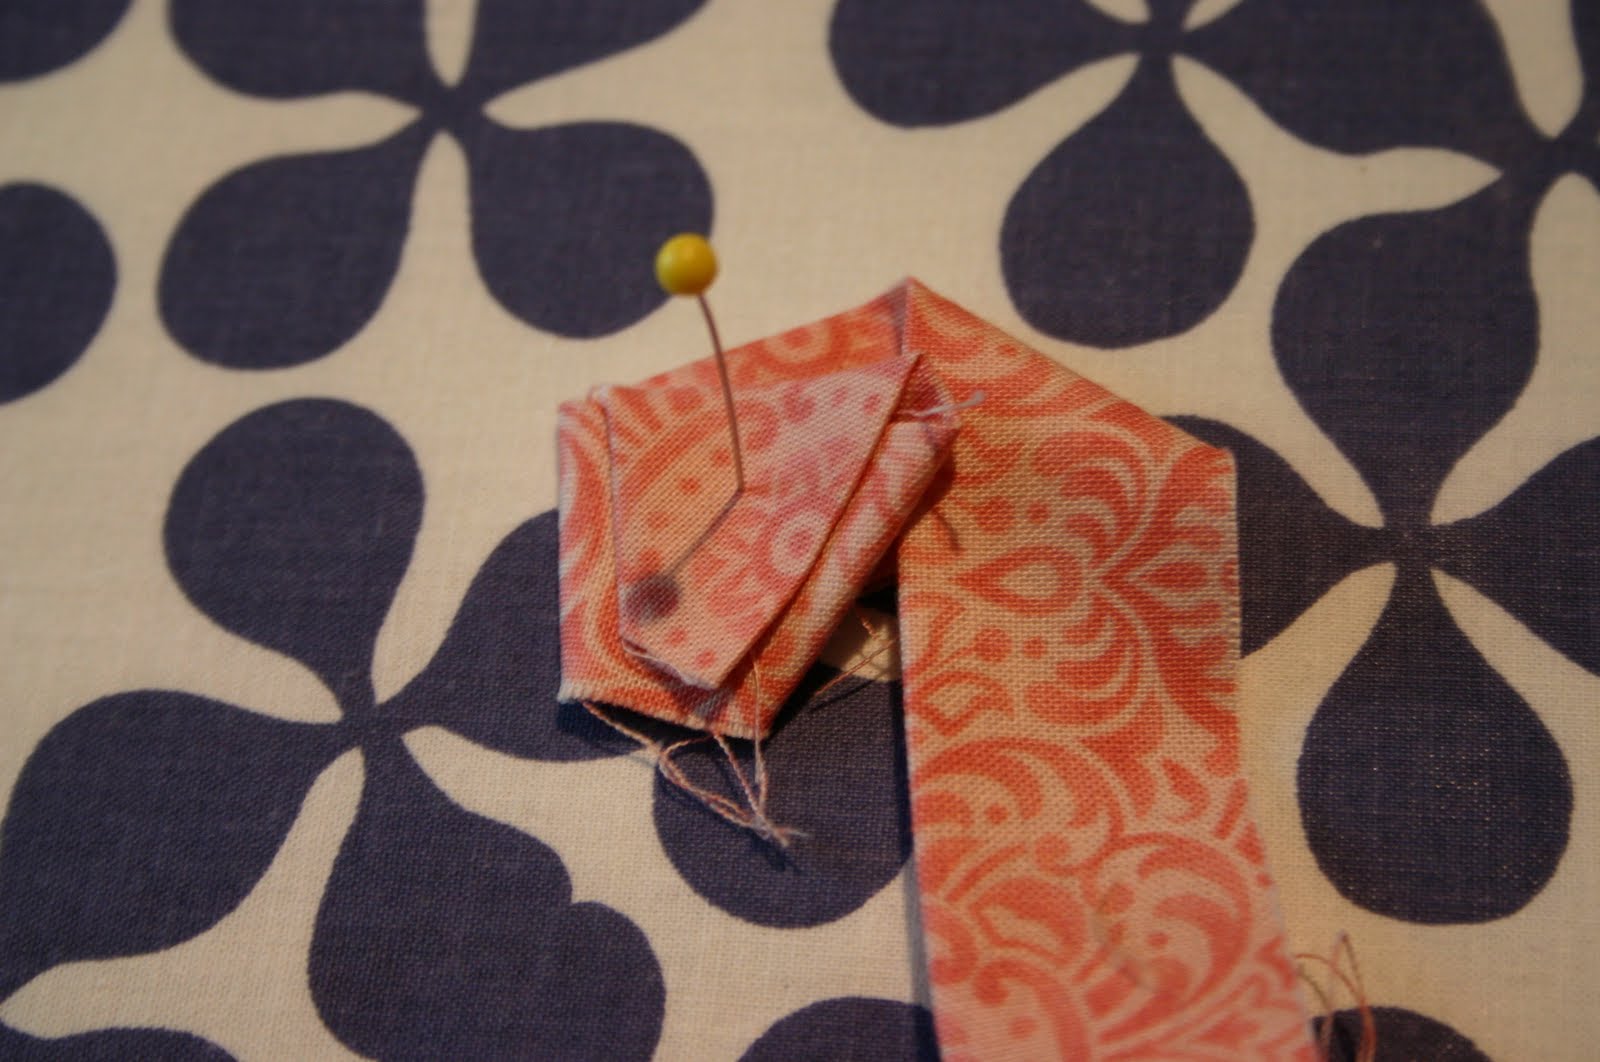
Start out by folding the top over to make a dog ear out of the fabric then iron in place.

Fold fabric over to create a triangle shape and press with iron.

Next you are going to loop your fabric back

and tuck it in between your triangle.

Snug the fabric up into a triangle and press.

Again you are going to loop your fabric back around

this time tuck the fabric behind the triangle

Fold your fabric down and tuck under triangle.
Snug up triangle and press (sorry for the blurry picture)

Continue folding and pressing to make a triangle shape until you run out of fabric.

When you are done it should look something like this.

Take a needle and thread in a similar color to fabric and sew threw the center of the flower catching all the layers to secure them together.

Next take a small piece of felt and a clip and hot glue them to the underside of flower.

I always turn the clip upside down when gluing because when you turn the flower over it will be right side up.

Embellish your flower however you choose. For this flower I chose flat back gems and hot glued them into place.

Now you are done!

This flower has pearl beads sewn into it center.


For this headband I made 3 flower that were the same size. Then I glued them to a fabric headband that I had made. I also used a piece of feather boa behind the flowers to give it that finishing touch.
I hope that was not to confusing. Just think "triangles" and you will be fine. Thanks for stopping by and happy folding!


I linked this project to:
craftomaniac
homemakeronadime
makingtheworldcuter
thecreativecrate
runwithglitter
todayscreativeblog
pollywantacrafter
diybydesign
sweetpeasandbb
sistersstuff
fingerprintsonthefridge
sugaranddots
I linked this project to:
craftomaniac
homemakeronadime
makingtheworldcuter
thecreativecrate
runwithglitter
todayscreativeblog
pollywantacrafter
diybydesign
sweetpeasandbb
sistersstuff
fingerprintsonthefridge
sugaranddots

Great flowers! The headband turned out beautiful! Love the touch of beads in the middle.
ReplyDeleteLove the flowers! Great tutorial!
ReplyDeleteThis is different. I like it. I have added you to http://pinterest.com/pin/30397362/
ReplyDeletethose are so cute!! i love how you made the flowers and i love how you mixed patterns!!
ReplyDeletei would love for you to come and check out my blog sometime! madisonavenue2011.blogspot.com
Thanks Madison Avenue. I check out your blog and became a follower. Super cute, thanks.
ReplyDeleteThanks for posting this! I've been dying to know how these particular rosettes are made!
ReplyDelete~Jessa
www.jessajill.blogspot.com
So super cute. I would love for you to come and link up this project to my Swing into Spring party. The link opens at 8pm EST tonight. Thanks.
ReplyDeleteGoodness these are cute!! What a great way to use up some of my fabric scraps - thanks for the great pics and tutorial!
ReplyDeleteYay! You came :) Really appreciate you sharing this great flower tutorial post with us at the Creative Bloggers' Party & Hop.
ReplyDeleteI just wanted to let you know I featured this over at Blissful and Domestic. Come grab a button:>
ReplyDeletewww.blissfulanddomestic.blogspot.com
Lovely! Those look fantastic!
ReplyDeleteI think we have the same ironing board too, clearly great minds think alike ;)
I hadn't seen a tutorial on this type of fabric flower. Thanks! I'm in the midst of trying to make my daughter some onesie dresses and want to make a coordinating headband, but the rosettes don't really showcase the fabric. This just might do the trick.
ReplyDelete