Wednesday, May 25, 2011

Apple Soap Teacher's Gift

The end of the school year is here all ready and it's time to make teachers gift's. If you are like me this is a very hard thing to do. I never know what to make or buy. My good friend came up with a brilliant idea to make apple soaps as gifts. She is brilliant I tell ya, brilliant. Of course we should make cute little apple soap to spoil my kids teachers. Okay so I think you get the point, I am very excited about this idea. So we got to it and came up with these cute little soap's. They even smell like apples!

Here is how you can make your own.

Supplies:
Glycerin Soap
Apple Soap Scent
Red & Green Soap Colors
Leaf Cookie Cutter
Small Round Containers

I picked up the bag of glycerin soap cubes from Hobby Lobby for $6.99, actually I used a 40% off so it was even cheaper than that. In the soap making isle at Hobby Lobby they also have scents and colors made especially for making soap. I picked up the leaf cookie cutter at Walmart. While I was there I also grabbed some zip-lock containers, pick containers that are the size you want your finished soaps to be.
 Start out by melting a few glycerin cubes in a large plastic measuring cup. Microwave in small increments. I usually start with 30 seconds and if that is not enough to melt the cubes I microwave them for another 10-20 seconds. This step should never take longer than 1 minute in the microwave. Once your cubes are melted add apple scent and red coloring.  I had this square soap mold from one of my other projects, you can use square containers or whatever you have hanging around that is square. Pour the melted soap into your mold. Fill the mold as full as you want your apples to be tall. I hope that makes sense. These are going to end up being your apples in the center of your soap so if you want skinny bars of soap pour your molds really shallow. Let the bars cool until they become solid. If you want to speed up this proses you can put the whole thing into the freezer for a few minutes. Just a heads up I made 4 red bars and only ended up using 1 1/2 bars to make apples for my 6 bars of soap.
 Once your soap is solid turn your mold over and pop your bars out. Slice the bars lengthwise and curl them into circles. If you do this step while the bars are still a little warm they are easier to curl.
 Next make some green soap. I used one of my kids small Ikea bowls to make a small green bar to cut leaves out of. Remove it from the bowl as soon as you can so that you will be able to easily cut through it with a cookie cutter.
 The soap got stuck in the cookie cutter so I used a Q-tip to help push it out.
 Place the leaves and apples into the bottom of your containers.

Next microwave more glycerin soap. This batch you are going to leave clear, do not color it. Do however add your apple scent to it. After you have melted more glycerin blocks in the microwave let them cool down for awhile before you pour it over your apples. I learned this lesson the hard way. The first apple I poured hot soap over and it melted my apple and made a mess. So let it cool down a little before you pour it over the soap and pour it slowly too. If you have a lot of bubbles in your soap take a spray bottle with rubbing alcohol and spray the top of the soap and the bubbles will pop. Once you have filled your mold place it into the freezer, this will help to not melt your apple. I only fill my molds full enough to cover my apple, you can fill yours as full as you like. Once the soap is set pop it out of its mold and voila cute little apple soap.
 

 I put my soap into zip bags then I whipped out some apple tags to tie onto them. You can also wrap your soap in plastic wrap instead of putting them into bags.

I sure hope my kids teachers enjoy them. 

I made these a few months ago. Click here if you want to see how I made them.

Monday, May 23, 2011

Fabric Flower Tutorial

I made up this cute flower pattern for headbands to match my girls Easter dresses. They turned out so cute that as promised I thought I would share them with you!


Start out by cutting your material into 2 inch strips, they need to be about 20 inches long. (you will need 1 strip per flower)

fold your material in half lengthwise placing wrong sides together and iron.
This flower is basically made by shaping your fabric into triangles.  
Start out by folding the top over to make a dog ear out of the fabric then iron in place.
Fold fabric over to create a triangle shape and press with iron.
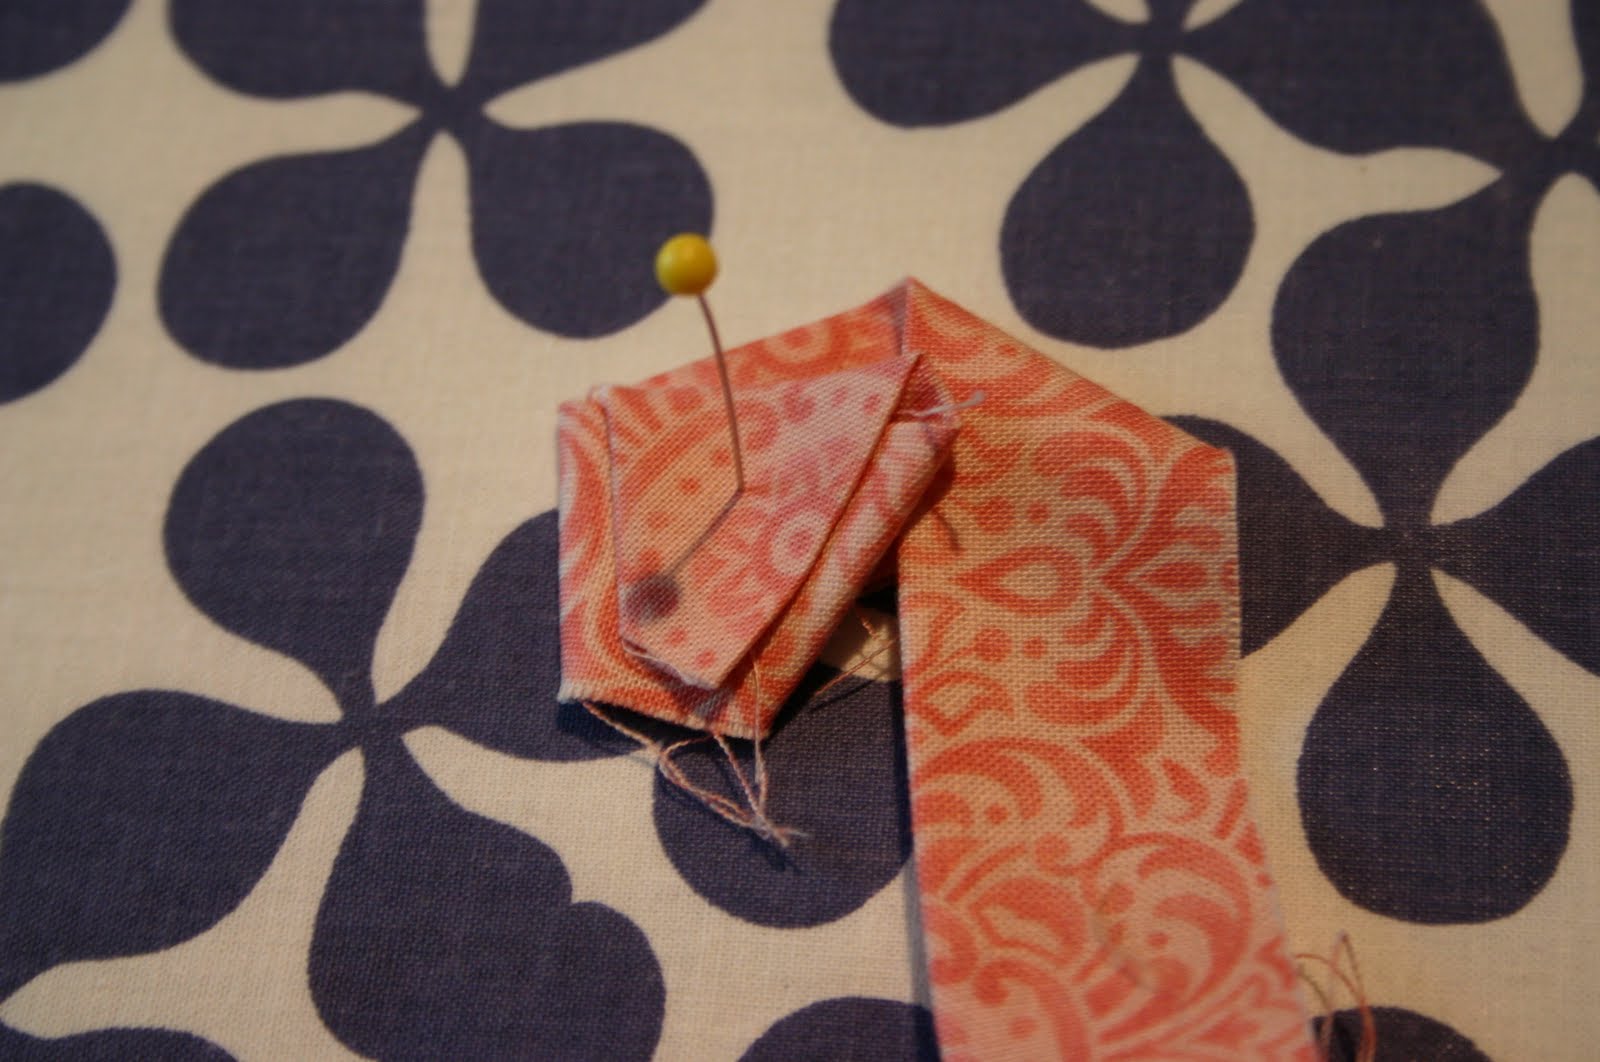
Next you are going to loop your fabric back
and tuck it in between your triangle.
Snug the fabric up into a triangle and press.
Again you are going to loop your fabric back around
this time tuck the fabric behind the triangle
Fold your fabric down and tuck under triangle.
Snug up triangle and press (sorry for the blurry picture)
Continue folding and pressing to make a triangle shape until you run out of fabric.

When you are done it should look something like this.
Take a needle and thread in a similar color to fabric and sew threw the center of the flower catching all the layers to secure them together.
Next take a small piece of felt and a clip and hot glue them to the underside of flower.
I always turn the clip upside down when gluing because when you turn the flower over it will be right side up.
Embellish your flower however you choose. For this flower I chose flat back gems and hot glued them into place.
Now you are done!
This flower has pearl beads sewn into it center.


For this headband I made 3 flower that were the same size. Then I glued them to a fabric headband that I had made. I also used a piece of feather boa behind the flowers to give it that finishing touch.
I hope that was not to confusing. Just think "triangles" and you will be fine. Thanks for stopping by and happy folding!


I linked this project to:
craftomaniac 
homemakeronadime
makingtheworldcuter
thecreativecrate
runwithglitter
todayscreativeblog
pollywantacrafter
diybydesign
sweetpeasandbb
sistersstuff
fingerprintsonthefridge
sugaranddots 
back to top